
neuromore Studio
Introduction
What is neuromore Studio?
Section titled “What is neuromore Studio?”neuromore Studio is a platform for building neurofeedback, biofeedback and research applications without writing code. You connect a biosensor, design a signal processing pipeline in a visual editor, and use the result to drive a game, a video, sound or your own software.
What Applications Can I Create with neuromore Studio?
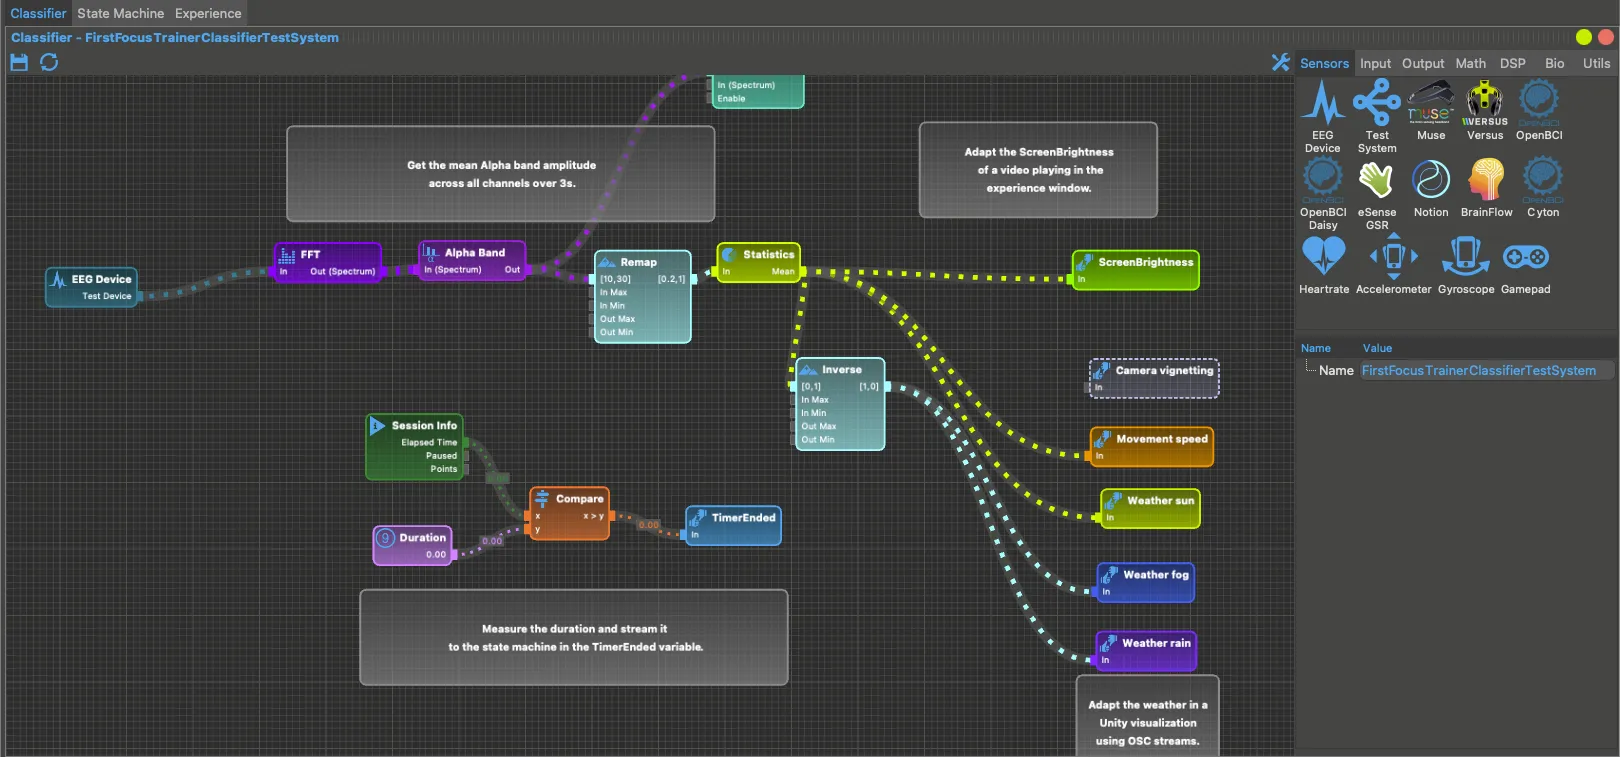
Section titled “What Applications Can I Create with neuromore Studio?”- Neurofeedback protocols: for example, a classifier that maps Alpha band amplitude to the brightness of a video.
- Biofeedback experiences: feedback driven by heart rate or another signal from a connected sensor.
- Research and analysis pipelines: filter, transform and inspect biosignals in real time.
A Hardware-Agnostic Platform to Interface a Variety of Bio-Sensors
Section titled “A Hardware-Agnostic Platform to Interface a Variety of Bio-Sensors”neuromore Studio separates your application from the hardware. The Engine, its signal processing core, has device integrations for a range of EEG devices and other biosensors, and a classifier reads them through device nodes.
These docs show what the neuromore system can do. Community builds on GitHub do not include every device driver. Developers can add those drivers in their own source build. Commercial clients can get the integration as part of their custom build. Each device is labelled, so check the label before you buy hardware.
Community builds include integrations for:
- Consumer headsets: InteraXon Muse, through muse-io or another program that sends Muse OSC messages. Neurosity Notion and Crown, through an external OSC source.
- Research boards: OpenBCI Cyton and Cyton with Daisy.
- Clinical or research amplifiers: ANT Neuro eego (Windows and Linux), Mitsar (Windows) and BrainMaster Discovery 20 (Windows x86 builds only, so use the x86 package).
- Heart rate monitors: Bluetooth LE devices that advertise the Heart Rate service.
- SenseLabs Versus.
- Further boards through BrainFlow: Studio bundles the BrainFlow library, the route to boards such as OpenBCI Ganglion and g.tec Unicorn. See BrainFlow boards.
- A simulated Test Device: an 8-channel test signal, so you can start without hardware.
Some devices need setup first. For example, the Bluetooth driver is off by default, and you enter BrainFlow board settings by hand. Biosensors has the platforms and setup steps for each device. Which native devices appear in Studio also depends on your neuromore account. BrainFlow boards do not depend on it.
For a sensor with no integration, you can send your own data stream to an OSC Input node, see OSC. Studio has no built-in route for GSR sensors. The Engine library accepts GSR data through its API.
These devices are part of the system’s capability, but not of community builds:
- Emotiv, NeuroSky, Tobii: Not in public build. Available through a source build (community) or a custom build (commercial clients). The vendor SDK is not in the repository.
- ABM, Brainquiry: Not in public build. Available through a source build (community) or a custom build (commercial clients). Windows 32-bit; vendor headers not in the repository.
- Brain Products actiCHamp: Not in public build. Available through a source build (community) or a custom build (commercial clients). The source has only a driver skeleton with no data path, so a build must complete it.
See Editions and licensing for how community builds and commercial clients’ builds differ.
Signal Processing Without Coding
Section titled “Signal Processing Without Coding”You don’t need to be a developer to create advanced signal processing pipelines. neuromore Studio’s visual editor lets neuroscientists, researchers, neurofeedback practitioners, artists and developers create neurofeedback protocols and data analysis pipelines by connecting nodes.
Advanced Neurofeedback Experiences
Section titled “Advanced Neurofeedback Experiences”The toolbox includes nodes such as FFT, Frequency Band, Dominant Frequency, Biquad Filter, Statistics, Remap and Auto Threshold. With these nodes you can build complex protocols, for example multi-channel Alpha/Theta amplitude training with automatic thresholds. The Nodes section describes them. To build a first classifier from scratch, follow Getting Started.
Studio comes with four visualizations for neurofeedback. Forest Walk and Infinite Tunnel have builds for Windows, macOS and Linux x64. Cartoon Town and Tropical Island are Windows only. No visualization has a build for Windows on Arm or for Linux on other CPUs.
You can also create custom experiences with text, images, buttons, audio and video, which a state machine controls in Studio’s Experience window. For example, a state machine can run a baseline phase at the start of the session, before training begins. See Experiences for Neurofeedback for details.
To use your own front end, Studio can send feedback values to other software, for example over OSC or WebSocket. See Integrations for all routes and the Unity section of Experiences for Neurofeedback for building your own games.
Data Analysis and Visualizations
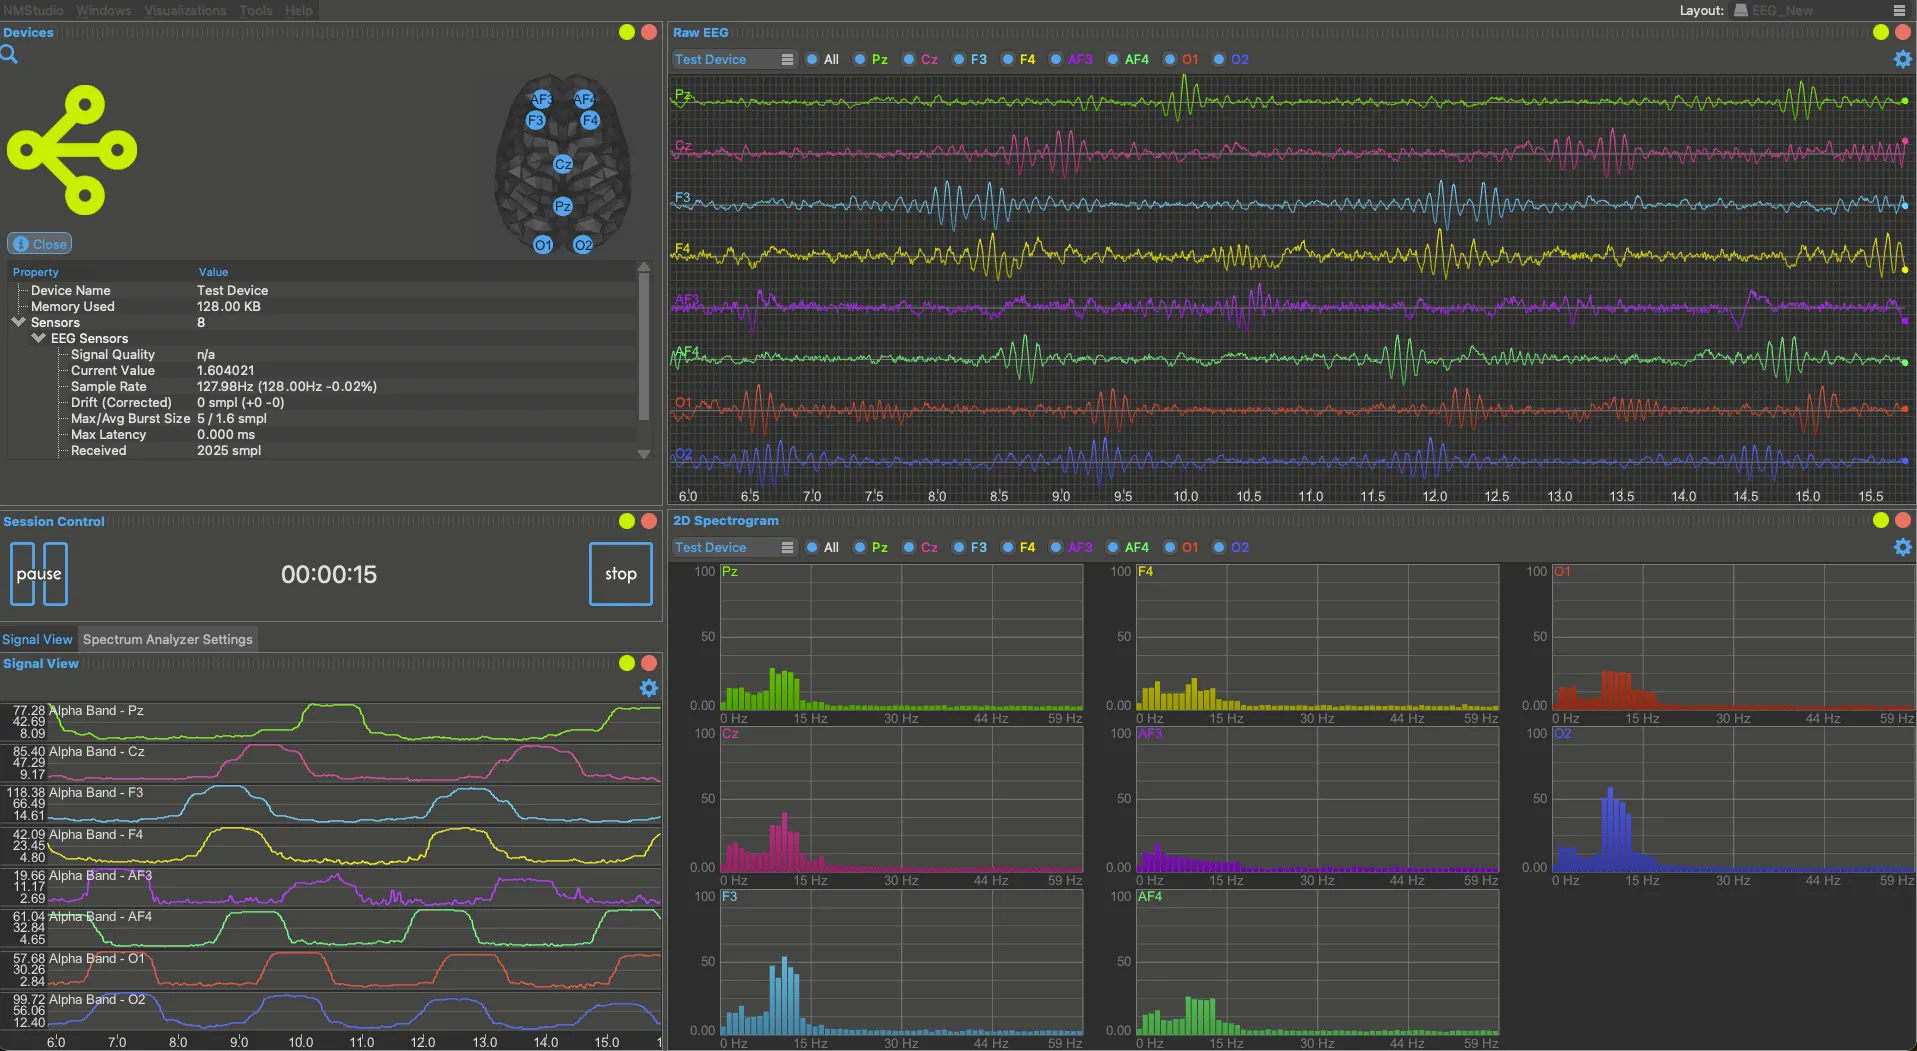
Section titled “Data Analysis and Visualizations”Studio has windows for inspecting your data in real time, including Raw EEG, Signal View, Spectrum View and 2D Spectrogram. See Windows, menus and shortcuts for the full list.
Accounts and the neuromore Cloud
Section titled “Accounts and the neuromore Cloud”Your classifiers, state machines and designs are stored in the neuromore cloud, and you manage them in the Back-End File System window. Cloud Output and Cloud Input nodes store and read parameter values there. After a session, Studio can open a web report for it in your browser. See Running a session.
neuromore Studio requires a neuromore account. You sign in when Studio starts, and there is no offline mode. You can create a free community account. Studio sends session details to the neuromore cloud when a session ends. Whether physiological data is uploaded depends on your account. See the Privacy Policy.
Commercial clients can have their own instance of the neuromore cloud, deployed in their own cloud account, and their own neuromore account. Contact neuromore or see the Platform page.
Next Steps
Section titled “Next Steps”- Setup: download and install Studio.
- Getting Started: build your first classifier.
- Running a session: start, pause and stop a session, and what happens to your data.
- Editions and licensing: community builds and commercial clients.