
neuromore Studio
Biosensors
Supported, Beta, Legacy and Not in public build items are labelled per row and section.
Device Overview
Section titled “Device Overview”neuromore Studio works with clinical or research amplifiers, consumer EEG devices and other biosensors.
These docs show what the neuromore system can do. Community builds on GitHub do not include every device driver. Developers can add those drivers in their own source build. Commercial clients can get the integration as part of their custom build. Each device is labelled, so check the label before you buy hardware.
See Editions and licensing for what the labels mean, and Devices for transports, channels and auto detection. Commercial clients usually run a custom build, so a label here may not describe your deployment. Contact neuromore about the device you use.
Electroencephalography (EEG)
Section titled “Electroencephalography (EEG)”| Vendor | Device | Status | Windows | Linux | macOS | Connects through |
|---|---|---|---|---|---|---|
| ABM | B-Alert X10, X24 | Not in public build | 32-bit, own build | No | No | Vendor SDK |
| ANT Neuro | eego 8, 32 and 64 channel amplifiers | Beta | Yes | x64 and x86 | No | Vendor SDK, included |
| BrainBit | BrainBit | Legacy | Yes | No | Library not packaged | BrainFlow |
| BrainMaster | Discovery 20 | Beta | x86 package only | No | No | Vendor library you get from BrainMaster |
| Brainquiry | PET 4.0 | Not in public build | 32-bit, own build | No | No | Vendor SDK |
| Callibri | Callibri EEG | Beta | Yes | No | Library not packaged | BrainFlow |
| Emotiv | EPOC, EPOC+, Insight | Not in public build | Own build | No | No | Vendor SDK |
| FreeEEG32 | FreeEEG32 | Beta | Yes | Yes | Yes (see note) | BrainFlow |
| g.tec | Unicorn | Beta | x64 only | x64 | No | BrainFlow |
| InteraXon | Muse | Beta | Yes | Yes | Yes | OSC from muse-io, which you get from Muse |
| Mitsar | EEG 201 | Beta | Yes | No | No | OSC from a connector you get from Mitsar |
| NeuroSky | MindWave | Not in public build | Own build | No | No | Vendor SDK |
| Neurosity | Notion 1, Notion 2 | Supported | Yes | Yes | Yes | Native OSC, or BrainFlow |
| Neurosity | Crown | Beta | Yes | Yes | Yes | Native OSC only |
| OpenBCI | Cyton | Supported | Yes | Yes | Yes (see note) | Native driver, or BrainFlow |
| OpenBCI | Cyton + Daisy | Beta | Yes | Yes | Yes (see note) | Native driver, or BrainFlow |
| OpenBCI | Ganglion, Galea, WiFi Shield | Beta | See BrainFlow devices | See there | See there | BrainFlow |
| SenseLabs | Versus | Supported | Yes | Yes | Yes (see note) | Native driver |
How to read this table:
- The platform columns say what the code and build files include. The latest community build is 1.7.3, and its device list is the same.
- Own build means a source build (community) or a custom build (commercial clients). See Devices not in the public build.
- Windows arm64 packages contain no vendor libraries.
- Note on macOS: the macOS app runs in a sandbox that declares USB and Bluetooth access, but no serial access. This may block devices that use a serial port.
- Library not packaged: the library exists for macOS x64 in the source repository, but the macOS package doesn’t include it.
Heart Rate Monitoring (HRM)
Section titled “Heart Rate Monitoring (HRM)”| Device | Status | Windows | Linux | macOS | Connects through |
|---|---|---|---|---|---|
| Bluetooth LE heart rate sensors | Supported | Yes | Yes | Yes | Native driver, off by default |
The driver accepts any sensor that advertises the standard Bluetooth LE Heart Rate service. See Bluetooth Smart Heart Rate Sensors.
Electromyography (EMG)
Section titled “Electromyography (EMG)”Studio has no dedicated EMG device that delivers data today. Studio reads only EEG channels from BrainFlow, so EMG-only and ECG-only boards don’t work. See Boards that deliver no data. To bring in EMG from your own source, see OSC Streaming / Unsupported Devices.
Other sensors
Section titled “Other sensors”| Vendor | Device | Status | Connects through |
|---|---|---|---|
| Tobii | EyeX eye tracker | Not in public build | Vendor SDK |
| Brain Products | actiCHamp | Not in public build | Driver skeleton only |
Device Details
Section titled “Device Details”These devices are in community builds. Each one needs the steps in its section. Some drivers are off by default. See Device Settings in Studio.
For kOhm values and contact quality per device, see Impedance and contact quality. OpenBCI values are estimated from the signal, not measured.
ANT Neuro
Section titled “ANT Neuro”
- Platforms: Windows, Linux (x64 and x86).
- Devices: eego amplifiers with 8, 32 or 64 channels, at 512 Hz. Use the eego 8ch, eego 32ch or eego 64ch node.
- Accepted amplifier types: EE410, EE411, EE430 (8 channels); EE212, EE214, EE222, EE223 (32 channels); EE211, EE215, EE224, EE225 (64 channels). EE213 and EE221 are end of life and rejected.
- Status: Beta.
The vendor SDK is included in the Windows and Linux x64 and x86 packages. Check that Enable eemagine Devices is on under NMStudio > Settings > Devices > Drivers. It is on by default. Studio looks for an amplifier every 3 seconds and handles one amplifier at a time.
Bluetooth Smart Heart Rate Sensors
Section titled “Bluetooth Smart Heart Rate Sensors”
- Platforms: Windows, macOS, Linux.
- Devices: any sensor that advertises the standard Bluetooth LE Heart Rate service, such as the Polar H7 or the Zephyr HxM Smart.
- Status: Supported.
Steps
- Tick Enable Bluetooth Devices under NMStudio > Settings > Devices > Drivers. It is off by default.
- Keep Automatic Device Search on. The driver then scans every 5 seconds while nothing is connected.
- Power on the sensor. If Studio finds one sensor, it connects. If it finds several, it asks you to pick one. Studio uses one sensor at a time.
If the sensor doesn’t appear, turn it off and on again. On Windows, you may have to pair it in Windows first.
Studio reads the heart rate in BPM, and the RR interval when the sensor sends it.
A comment in the code warns that this driver stops working once the Versus driver is active. Leave Enable Senselabs Devices off when you use a heart rate sensor.
Brainmaster
Section titled “Brainmaster”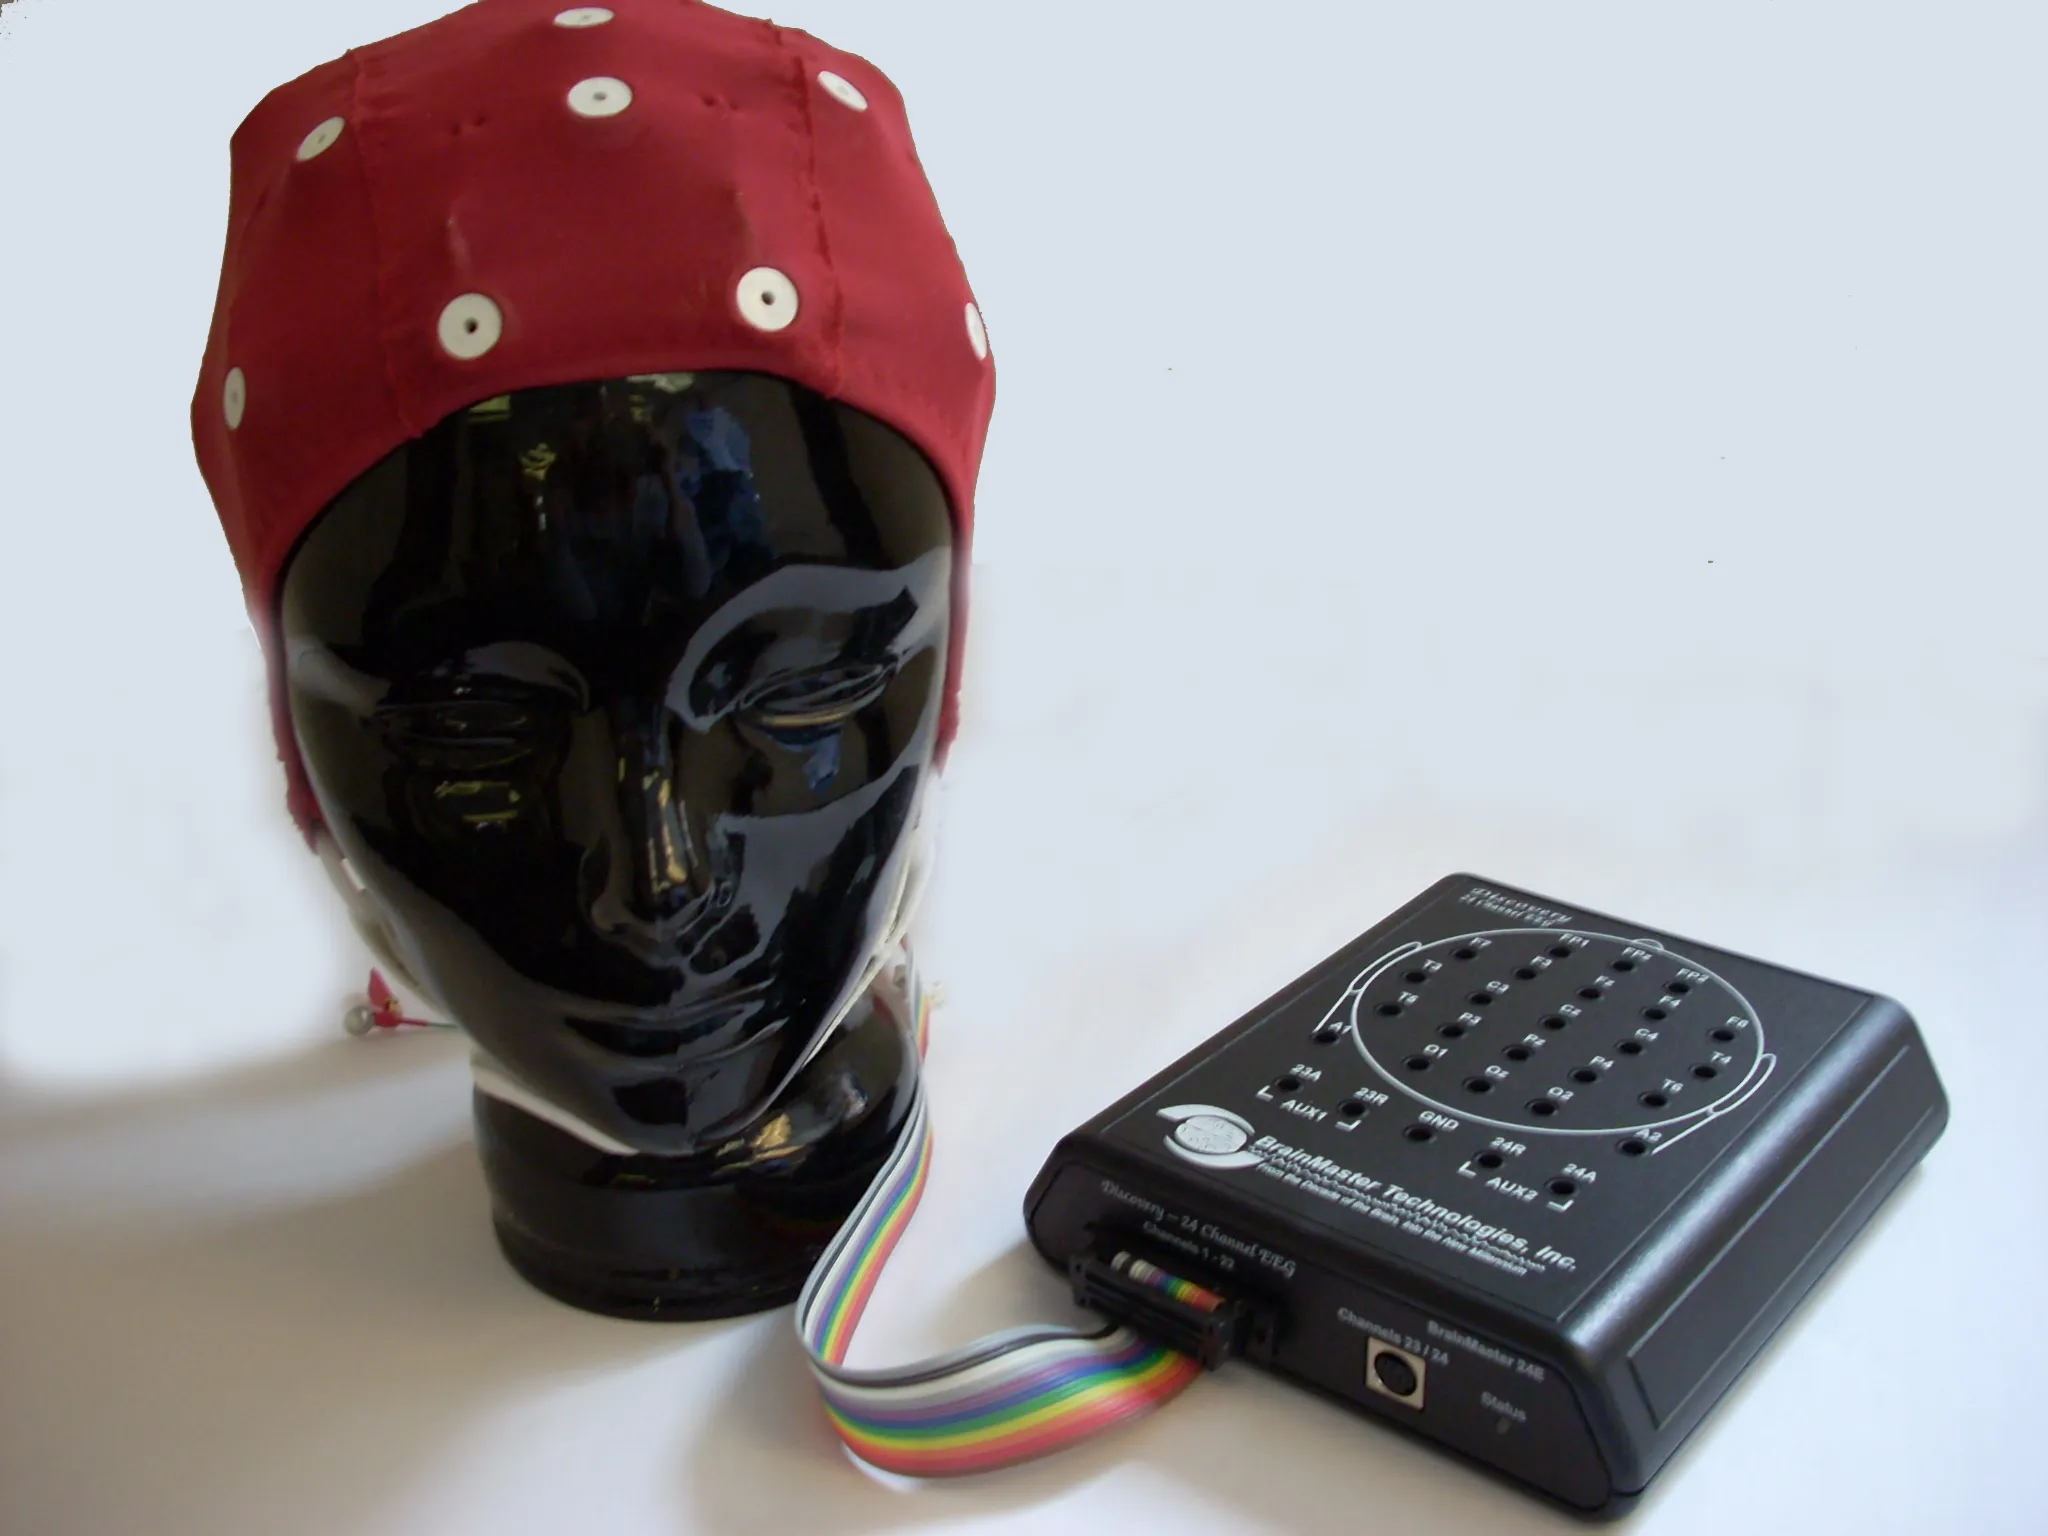
- Platforms: Windows, x86 package only. The x64 and arm64 packages don’t include this driver.
- Devices: Discovery 20.
- Status: Beta.
Steps
-
Install the FTDI drivers for the device.
-
Contact BrainMaster to get the library
bmrcm.dll. It is not part of Studio. -
Copy
bmrcm.dllinto the folder that holds the Studio executable.In 1.7.3: The Studio executable is named
Studio.exe. -
Start Studio. Under NMStudio > Settings > Devices, in the BrainMaster group, enter Code Key, Serial Number and Pass Key. Studio can’t connect until all three are set.
-
Power on the device. Studio looks for it every 3 seconds. Enable BrainMaster Devices is on by default.
To check impedance, use the test in the Devices window. See Impedance and contact quality.
InteraXon Muse
Section titled “InteraXon Muse”
- Platforms: Windows, macOS, Linux.
- Devices: this section was written for the standard Muse, model MU-01. Studio reads the OSC stream from muse-io and can’t tell models apart, so model support depends on muse-io. Studio starts muse-io with the headband’s default preset.
- Status: Beta.
Muse connects through muse-io, a program from the older Muse SDK. Studio doesn’t include it. Earlier versions of this page used SDK 3.4.1, and those download links no longer work. Check the Muse developer page or ask Muse for access.
Steps
- Get the SDK and install it.
- On Windows: copy the Muse folder from the installed location under
%PROGRAMFILES(X86)%to the folder of the Studio executable. Do this before you start Studio, because the menu entry appears only ifMuse\muse-io.exeis there at startup. - Start Studio and click Start MuseIO in the Tools menu.
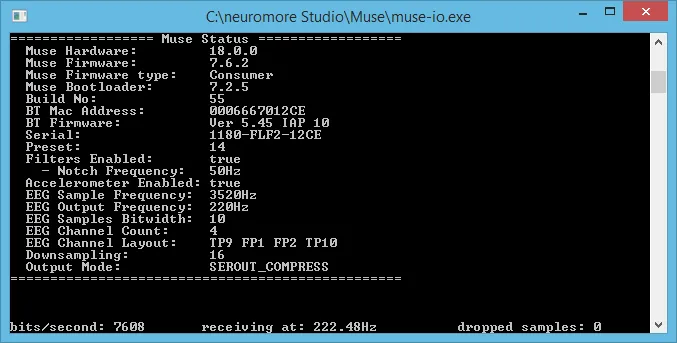
- Windows: Studio starts
muse-io.exefrom the Muse subfolder. - macOS and Linux: Studio asks you to select the muse-io program, then shows the command to run in a terminal.
The device appears when Studio receives the first OSC data.
Studio always tells muse-io to send to UDP port 4545. Keep NMStudio > Settings > Network > OSC Server > Input UDP port at 4545, its default. If you changed it, for example for Neurosity, Muse data stops arriving.
Community projects. Three community projects forward Muse data to Studio over OSC: muse-osc, a Python library for Muse 2; muse2-neuromore through the Mind Monitor app; and LSL_Neuromore through an LSL stream. neuromore does not maintain them, and the last two were written for older Studio versions.
Mitsar
Section titled “Mitsar”- Platforms: Windows.
- Devices: Studio has one Mitsar device, EEG 201, with the node Mitsar-EEG 201, 23 channels at 500 Hz. Earlier versions of this page also listed the EEG 202-24 and EEG 202-31. Whether those work depends on the vendor’s connector.
- Status: Beta.
The connector MitsarConnector.exe sends data to Studio over OSC. It comes with the vendor SDK and is not part of Studio. Contact Mitsar to get it.
Steps
- Copy the SDK folder Mitsar, with
MitsarConnector.exeinside, to the folder of the Studio executable. - Tick Enable Mitsar Devices under NMStudio > Settings > Devices > Drivers. It is off by default.
- Keep Automatic Device Search on. Studio then starts the connector by itself. If you turned the search off, click the Search button in the Devices window.
Neurosity
Section titled “Neurosity”
- Platforms: Windows, macOS, Linux.
- Devices: Notion 1, Notion 2 and Crown. Notion runs at 250 Hz and Crown at 256 Hz, with 8 channels each.
- Status: Supported for Notion. Beta for Crown.
Neurosity devices send their data to Studio over OSC. There is no driver and no scan, so the Search button doesn’t help.
Enabling OSC in the Neurosity developer console
The console is a vendor site and may have changed since this was written.
- Create an account in the Neurosity console if you don’t have one. See the Neurosity documentation.
- Go to your device settings in the developer console and enable OSC.
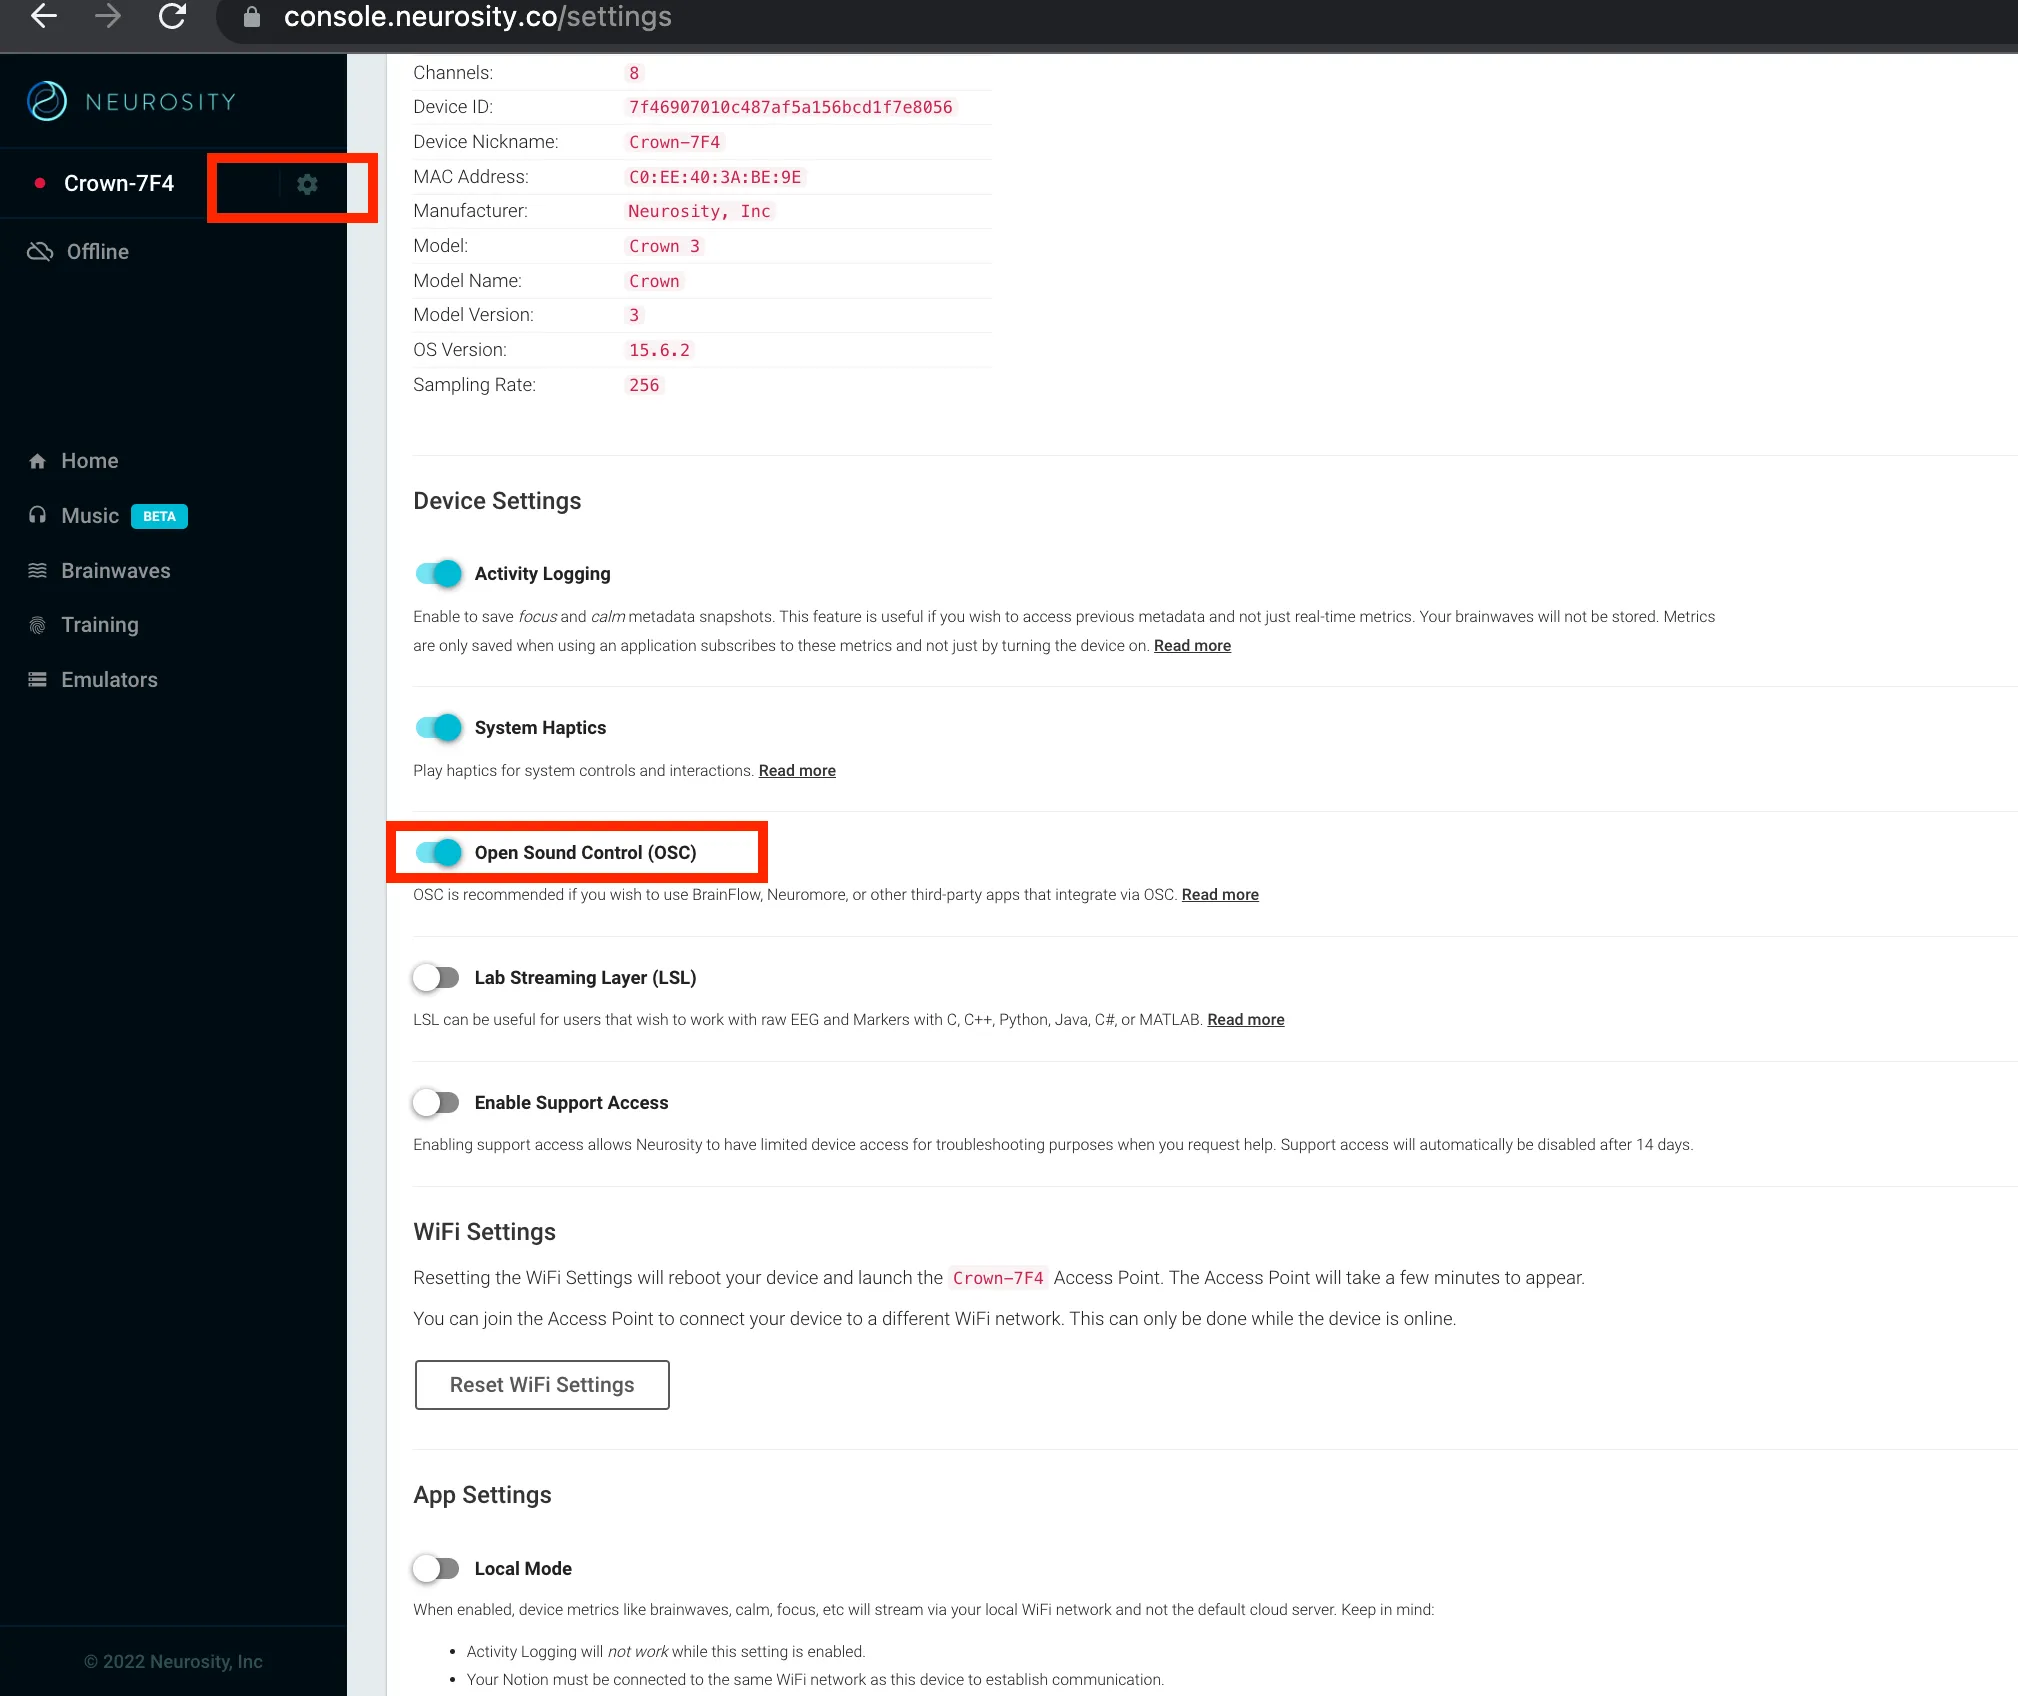
Connecting your Neurosity device in neuromore Studio
- Go to NMStudio > Settings > Network > OSC Server and set Input UDP port to the port your device sends to. The steps here use 9000. This port is shared: Muse data and OSC Input nodes then have to use it too, and Muse always sends to 4545.
- Make sure OSC messages from the device can reach your computer. Earlier versions of this page advised putting both on the same WiFi network.
- Start the device. It appears in the Devices window when Studio receives its first info message. If it doesn’t appear, check that OSC is on, and that the port matches.
- In the Devices window, click Info on the device. The device ID is the number in parentheses in the Device Name row, for example Neurosity Crown (32854).
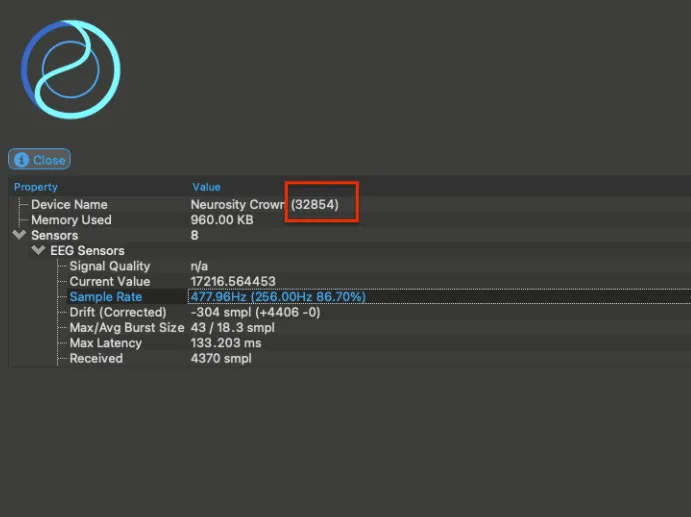
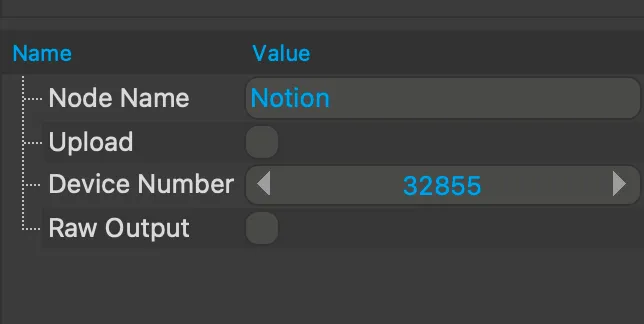
- Add a Notion or Crown node to the classifier, matching your device. Set its Device Number to the device ID plus 1. For example, if the device ID is 32854, set 32855.
An earlier version of this page reported signal drift when streaming from Neurosity devices. Drift Correction is off by default. See Device Settings in Studio.
In 1.7.3: Drift Correction is on by default.
Notion is also available through BrainFlow. Crown is not, because the bundled BrainFlow has no Crown board. See BrainFlow devices. Use one path at a time, because the native path and the BrainFlow node can’t share a port: the node may fail to open it. See BrainFlow boards.
OpenBCI
Section titled “OpenBCI”
- Platforms: Windows, macOS, Linux. On macOS, see the note on serial access in the table above.
- Devices: Cyton with 8 channels at 250 Hz, and Cyton + Daisy with 16 channels at 125 Hz. A comment in the code says device detection may not work with the 32-bit board.
- Status: Supported for Cyton. Beta for Cyton + Daisy.
Channels are named 1 to 8 on Cyton and 1 to 16 on Cyton + Daisy. Channels 9 to 16 have no electrode position.
In 1.7.3: The 16 Daisy channels are named P3, P4, Oz, Fz, T5, T6, F3, F4, T3, T4, C3, C4, Cz, O1, O2 and Pz. A classifier that selects Daisy channels by these names needs review in 1.8.2. Daisy also times out after 5 seconds without data, instead of 60.
Steps
- Check that Enable OpenBCI Devices is on under NMStudio > Settings > Devices > Drivers. It is on by default.
- Connect your OpenBCI board to your computer. Studio finds the OpenBCI USB dongle by its USB ID and probes it once per second.
OpenBCI gives this advice for your operating system. Studio doesn’t check any of it.
- Windows: Make sure your board is recognized as a COM port and that its latency is set to 1 ms. See the OpenBCI on Windows guide.
- macOS: Make sure your board is connected and visible as a device. To check, type
ls /dev/tty.*in a terminal. See OpenBCI’s FTDI buffer fix for macOS.
The kOhm value shown for OpenBCI is an estimate from the signal. See Impedance and contact quality.
SenseLabs Versus
Section titled “SenseLabs Versus”
- Platforms: Windows. The code also compiles on macOS and Linux, where the driver tries every serial port.
- Devices: Versus, non-BTLE version, with 5 channels at 250 Hz.
- Status: Supported.
Studio does not support the consumer Bluetooth LE version of the Versus. It supports the research edition with a standard Bluetooth interface. Contact SenseLabs for details.
Setting up the Versus on Windows
Do this the first time you connect your Versus to a Windows PC, before any application accesses the device. Without it, you may have to reset the device, as described below. This procedure comes from an earlier version of this page. It is vendor and Windows behaviour that Studio can’t check.
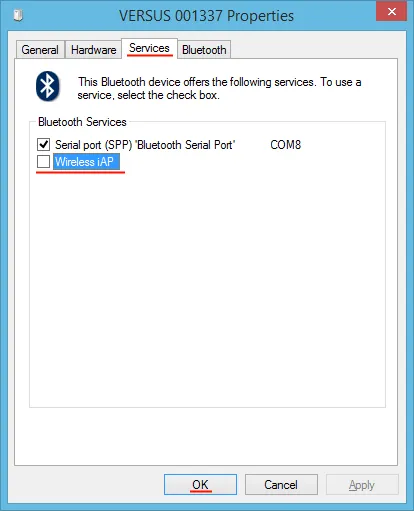
- Make sure neuromore Studio, and any other software that could access the device, is not running.
- Pair the Versus with your Windows PC.
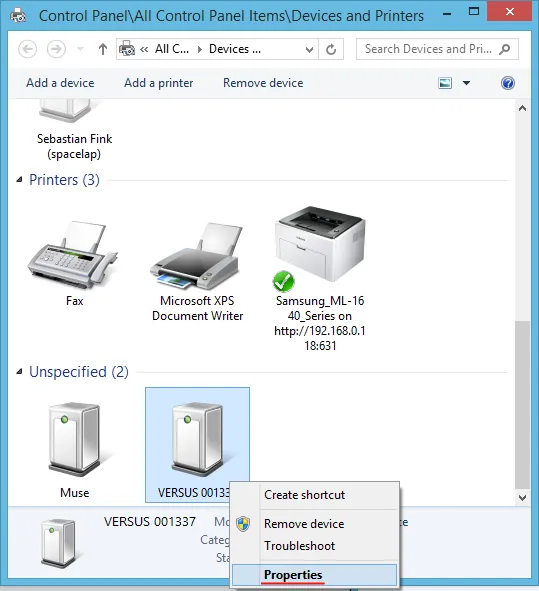
- Open the Devices and Printers Windows Control Panel.
- Right click on your Versus device and select Properties. A window will pop up.
- Disable the Wireless iAP service under the tab Services.
Resetting the Versus
If you started an application that accessed the Versus before you disabled the iAP Bluetooth service, reset the device:
- Turn off the Versus.
- Turn it on again but don’t release the button.
- Keep the button pressed until the LED blinks red. The device is now reset.
Connecting the Versus in Studio
- Start Studio.
- Tick Enable Senselabs Devices under NMStudio > Settings > Devices > Drivers. It is off by default.
- Under NMStudio > Settings > Devices, turn Automatic Device Search off and on again. Ticking the box doesn’t start the scan. It starts only when the search is switched on while the driver is already enabled.
- Repeat step 3 after each Studio start. Studio remembers the tick, but it doesn’t start the scan by itself.
A comment in the code warns that Bluetooth LE heart rate sensors stop working once this driver is active.
Devices not in the public build
Section titled “Devices not in the public build”These drivers exist in the source code, but they are not compiled into community builds. Don’t plan on them working in a downloaded build. Vendor SDK licensing is not yet confirmed.
- Emotiv EPOC, EPOC+ and Insight: Not in public build. Available through a source build (community) or a custom build (commercial clients). The vendor SDK is not in the repository.
- NeuroSky MindWave: Not in public build. Available through a source build (community) or a custom build (commercial clients). The vendor SDK is not in the repository.
- Tobii EyeX: Not in public build. Available through a source build (community) or a custom build (commercial clients). The vendor SDK is not in the repository.
- ABM B-Alert X10 and X24: Not in public build. Available through a source build (community) or a custom build (commercial clients). Windows 32-bit; vendor headers not in the repository.
- Brainquiry PET 4.0: Not in public build. Available through a source build (community) or a custom build (commercial clients). Windows 32-bit; vendor headers not in the repository.
- Brain Products actiCHamp: Not in public build. Available through a source build (community) or a custom build (commercial clients). The source has only a driver skeleton with no data path, so a build must complete it.
Commercial clients: contact neuromore about a custom build.
Adding a driver in a source build
Section titled “Adding a driver in a source build”See also Engine library and source builds and BUILDING.md. Paths are relative to the Studio repository.
- Get the SDK from the vendor. neuromore has no download for it.
- Copy the headers to the vendor’s folder under
deps/include. - Copy the
*.liband*.dllfiles todeps/prebuilt/win/x86for a 32-bit build, ordeps/prebuilt/win/x64for a 64-bit build. - Enable the flag in
src/Engine/Config.h. - Studio’s Windows code already names the vendor
*.libfiles for these devices, so you don’t add them to the link settings. - Build. Keep the
*.dllfiles next to the Studio executable. - Start Studio and tick the driver’s checkbox under NMStudio > Settings > Devices > Drivers.
| Device | Flag | Headers in | Build | Checkbox, default |
|---|---|---|---|---|
| ABM B-Alert X10, X24 | INCLUDE_ |
deps/include/ABM |
Windows 32-bit | Enable Advanced Brain Monitoring Devices, off |
| Brainquiry PET 4.0 | INCLUDE_ |
deps/ |
Windows 32-bit | Enable Brainquiry Devices, on |
| Emotiv | INCLUDE_ |
deps/include/emotiv |
Windows | Enable Emotiv Devices, off |
| NeuroSky MindWave | INCLUDE_ |
deps/ |
Windows | Enable NeuroSky Devices, off |
| Tobii EyeX | INCLUDE_ |
deps/include/eyex; create this folder |
Windows | Enable Tobii Devices, off |
actiCHamp is outside these steps. Studio registers no driver for it, so no checkbox appears, and the driver skeleton has no data path. A build must add both first.
ABM B-Alert X10/X24
Section titled “ABM B-Alert X10/X24”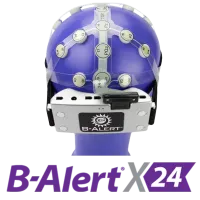
- Platforms: Windows 32-bit build.
- Devices: B-Alert X10 and X24.
- Files:
AbmSdkInclude.hand the other SDK headers;ABM*.libandABM*.dll. Ask Advanced Brain Monitoring about the SDK.
Brainquiry PET 4.0
Section titled “Brainquiry PET 4.0”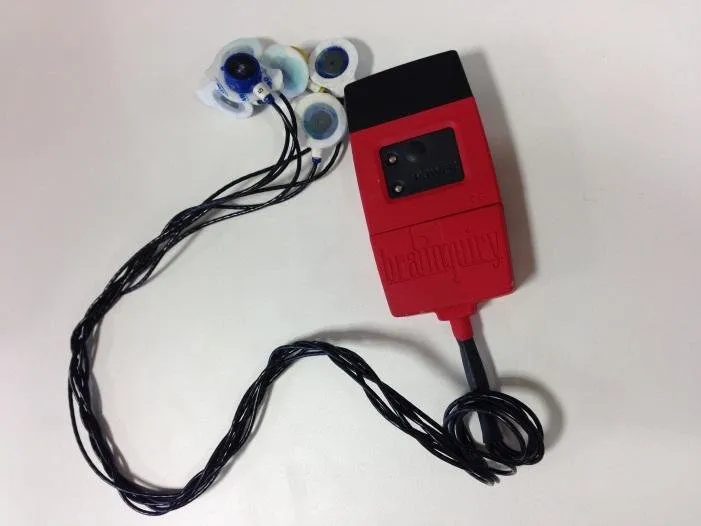
- Platforms: Windows 32-bit build.
- Files:
BQPetDLL.h,BQPetDLL.libandBQPetDLL.dll. Ask Brainquiry about the SDK.
Emotiv EPOC/Insight
Section titled “Emotiv EPOC/Insight”- Platforms: Windows.
- Files: the driver includes
edk.h,edkErrorCode.h,EmoStateDLL.h,EmoStateAffectiv.h,EegData.h,Iedk.h,IedkErrorCode.h,IEmoStateDLL.h,IEmoStatePerformanceMetric.handIEegData.h, plus the matching*.liband*.dllfiles. The Emotiv community SDK repositories are no longer available at their old addresses. Ask Emotiv about SDK access.
In such a build, turn on your headset and plug in the Emotiv USB receiver, in either order. The device appears once connected.
Emotiv EPOC / EPOC+
Section titled “Emotiv EPOC / EPOC+”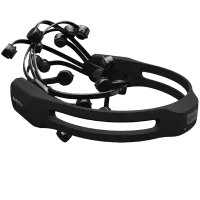
- Devices: EPOC, EPOC+.
Emotiv Insight
Section titled “Emotiv Insight”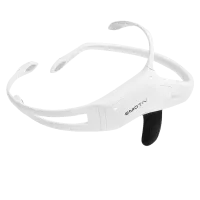
- Devices: Insight with the Emotiv USB receiver.
NeuroSky
Section titled “NeuroSky”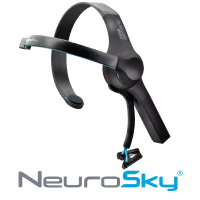
- Platforms: Windows.
- Devices: MindWave (model MW003).
- Files:
thinkgear.h;thinkgear.libandthinkgear.dllfor a 32-bit build;thinkgear64.libandthinkgear64.dllfor a 64-bit build. Ask NeuroSky about the SDK.
In such a build, pair the device with your PC and turn it on. It appears once the connection is established.
BrainFlow devices
Section titled “BrainFlow devices”
BrainFlow is an open-source library that connects many biosensors through one API. Studio bundles BrainFlow 4.0.1 and offers it through the BrainFlow node. See BrainFlow boards for channels, rates and vendor libraries.
The BrainFlow driver and nodes are available on every account. Enable BrainFlow Driver is on by default.
Connecting a board
Section titled “Connecting a board”There is no scan for BrainFlow hardware. A board connects only from a node.
- Add a BrainFlow node from the Sensors category of the palette.
- Choose your board in Board ID. The default is Synthetic, which needs no hardware.
- Fill in the fields your board needs. See the table below.
- Press Apply. Field changes have no effect until you do.
When you load a saved classifier, press Apply again. From reading the code, the saved board doesn’t connect until you do.
If the board can’t connect, the node shows “Device not connected”. Details are in brainflow.log in Studio’s data folder.
Use one path for a Cyton board. The native OpenBCI scan is on by default and probes the board’s serial port every second, so it can hold the port that a BrainFlow or Cyton node needs. To stop the scan, turn off Automatic Device Search under NMStudio > Settings > Devices. This applies to all drivers. Unticking Enable OpenBCI Devices doesn’t stop the scan.
Studio reads only EEG channels from BrainFlow.
The node’s other fields are MAC address, IP address (default 192.168.4.1), IP port (default 50000), IP protocol, Other info, Timeout, Serial number and File.
Boards
Section titled “Boards”| Board ID | Device | Fields to set | Windows | Linux | macOS |
|---|---|---|---|---|---|
| Synthetic | Simulated board, no hardware | None | Yes | Yes | Yes |
| Cyton, CytonDaisy | OpenBCI Cyton, with or without Daisy | Serial port | Yes | Yes | Yes (see note) |
| Ganglion | OpenBCI Ganglion over a Bluetooth dongle | Serial port of the dongle; MAC address optional | x64, x86 | Library not packaged | Library not packaged |
| GanglionWifi, CytonWifi, CytonDaisyWifi | OpenBCI boards with WiFi Shield | IP port; IP protocol not UDP; IP address optional | Yes | Yes | Yes |
| Galea | OpenBCI Galea | IP address | Yes | Yes | Yes |
| Fascia | Fascia | IP port | Yes | Yes | Yes |
| IronBCI | IronBCI | Serial port | Yes | Yes | Yes (see note) |
| FreeEEG32 | FreeEEG32 board | Serial port | Yes | Yes | Yes (see note) |
| NotionOSC1, NotionOSC2 | Neurosity Notion 1 and 2 | IP port: set it to the port the device sends to, because the node default of 50000 is not BrainFlow’s 9000. Serial number optional | Yes | Yes | Yes |
| BrainBit | BrainBit | None; Serial number and Timeout optional | Yes | No | Library not packaged |
| CallibriEEG | Callibri EEG, one unnamed channel | None; Serial number and Timeout optional | Yes | No | Library not packaged |
| Unicorn | g.tec Unicorn | None; Serial number optional | x64 | x64 | No |
Note: see the note on macOS serial access in the table above.
Library not packaged: the vendor library is missing from that platform’s package. A source build copies the libraries it has next to the executable, where BrainFlow looks for them.
Windows arm64 packages contain no vendor libraries. On Linux, the Unicorn library is installed to usr/lib, while BrainFlow looks in the folder of the executable, so it may not load.
BrainBit works through BrainFlow on Windows. The BrainFlow boards page lists this legacy board, and a native driver is planned. See BrainBit connection and setup.
Neurosity Crown is not in the bundled BrainFlow. Use the native Neurosity path.
The BrainFlow documentation describes these parameters. It tracks the latest BrainFlow, so it lists boards and options that the bundled 4.0.1 from 2021 doesn’t have.
Boards that deliver no data
Section titled “Boards that deliver no data”Board ID also offers these. They are selectable, but they have no EEG channel list, so Studio removes the device after it connects:
- CallibriEMG and CallibriECG
- GforcePro, the Oymotion EMG armband
- PlayBack and Streaming
The Cyton node
Section titled “The Cyton node”The Cyton node is a shortcut for the OpenBCI Cyton through BrainFlow. It shows only Serial port. The default is COM3 on Windows, /dev/ttyUSB0 on Linux and /dev/cu.usbserial-DM0258D9 on macOS, so most Mac users must change it. It has no Apply button. It opens the port as soon as you drop it into the classifier, and again when you change the port. Stop the native OpenBCI scan first, as described under Connecting a board.
On macOS, run ls /dev/cu.usb* in a terminal to find the port name, then enter it in Serial port. You can also read it under Tools > Information > Serial Ports. If the dongle doesn’t appear, you may need the FTDI VCP driver.
Device Settings in Studio
Section titled “Device Settings in Studio”Device settings are in NMStudio > Settings > Devices.
Which drivers and devices appear can depend on your neuromore account. If one is missing, contact neuromore.
Drivers
Section titled “Drivers”The checkboxes are in the Drivers group. Saved settings override these defaults.
| Checkbox | Default | Applies to |
|---|---|---|
| Enable Test Devices | On | Simulated test device |
| Enable OpenBCI Devices | On | OpenBCI Cyton and Cyton + Daisy |
| Enable eemagine Devices | On | ANT Neuro eego; Windows and Linux |
| Enable BrainMaster Devices | On | Discovery 20; Windows x86 package |
| Enable BrainFlow Driver | On | BrainFlow nodes |
| Enable Mitsar Devices | Off | Mitsar; Windows |
| Enable Senselabs Devices | Off | SenseLabs Versus |
| Enable Bluetooth Devices | Off | Bluetooth LE heart rate sensors |
You don’t have to turn off the test device. It appears only when no other device exists, and goes away when a real device connects.
Automatic Device Search
Section titled “Automatic Device Search”Automatic Device Search is on by default. While it is on, the Search button in the Devices window is hidden.
If you turn it off, the Search button appears and runs one search across all enabled drivers. For BrainFlow, Search does not look for hardware. It removes the first BrainFlow device, whatever its board, or adds a Synthetic board if there is none. So Search can disconnect a running BrainFlow board.
Other settings
Section titled “Other settings”- Local Power Line Frequency: Auto, 50 Hz or 60 Hz. The default is Auto.
- Drift Correction group: Enable Drift Correction is off by default. Max Drift in Seconds defaults to 2, Drift Tolerance (Early Signal) in Seconds to 0.2, and Drift Tolerance (Late Signal) in Seconds to 1.
In 1.7.3: Enable Drift Correction is on by default.
OSC Streaming / Unsupported Devices
Section titled “OSC Streaming / Unsupported Devices”Any device or software that can send OSC over UDP can feed a classifier through an OSC Input node. The device needs no driver.
- Send to UDP port 4545, the default. To change it, go to NMStudio > Settings > Network > OSC Server > Input UDP port.
- Add an OSC Input node from the Input category. Set OSC address to the address you send to. The address must be unique among your OSC Input nodes.
- Send at a steady rate, and set Sample rate to that actual rate. The default is 128 Hz.
- Connect the node’s output to another node. A node with nothing connected doesn’t run.
See the OSC Tutorial.